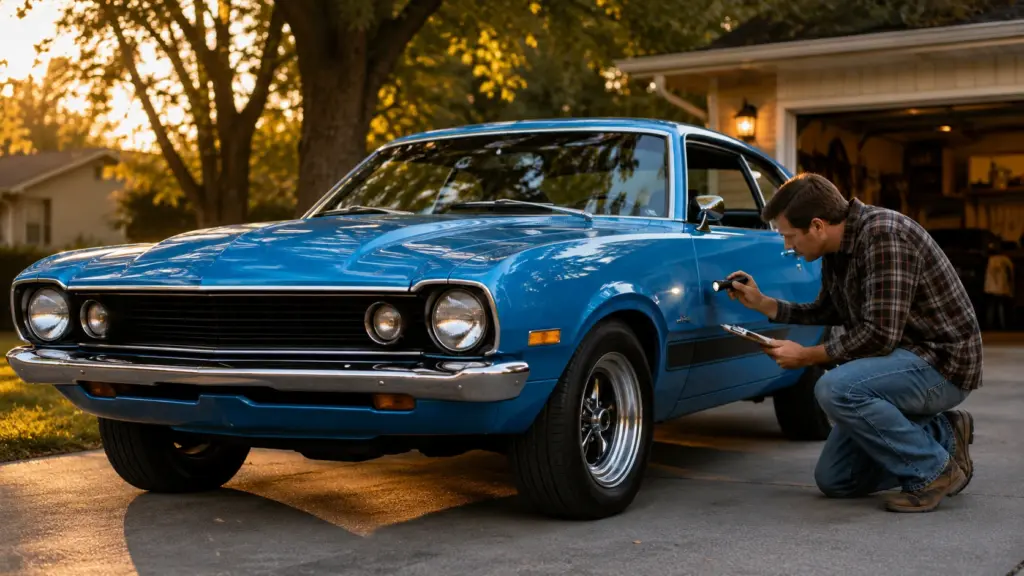
Ford Maverick rust areas are the single most important thing to inspect before buying one of these classic American coupes. A shiny paint job and a smooth-running engine can easily distract you from hidden corrosion that may cost thousands of dollars to repair. Knowing where these cars commonly rust can help you avoid expensive surprises and confidently choose a solid project or survivor.
Imagine you’ve finally found the Ford Maverick you’ve been searching for. The paint shines in the afternoon sun, the chrome sparkles, and the seller proudly claims it’s “rust-free.” Everything looks promising until you grab a flashlight and discover bubbling paint behind the front wheel, soft floor pans, and hidden corrosion in the torque boxes.
Suddenly, what looked like a bargain becomes a restoration project.
Built between 1970 and 1977, the Ford Maverick is a popular classic thanks to its simple mechanics, timeless styling, and affordable entry price. However, after more than five decades on the road, rust has become the biggest enemy of these cars.
In this guide, you’ll learn about the 15 Ford Maverick rust areas every buyer should inspect, how to identify hidden corrosion, which repairs are manageable, and when it’s smarter to walk away.
Many rust-prone areas are hidden behind body panels or inside frame rails. Using the right car inspection tools makes it much easier to identify corrosion before purchasing a vehicle.
Why Ford Maverick Rust Is So Common
Before inspecting individual rust spots, it’s worth understanding why the Ford Maverick is particularly vulnerable to corrosion.
During the early 1970s, corrosion protection simply wasn’t a priority for most manufacturers. Galvanized steel wasn’t widely used, factory rustproofing was limited, and many body panels featured overlapping seams that trapped moisture. Once water found its way into these cavities, it often remained there for months or even years.
Several factors accelerate rust on classic Mavericks:
- Exposure to salted winter roads
- Coastal climates with salty air
- Long-term outdoor storage
- Clogged drain holes
- Worn weatherstripping around windows and doors
- Dirt and mud trapped inside body cavities
- Vinyl roofs that trap moisture beneath the covering
Even cars that appear clean from the outside may have serious corrosion hiding beneath undercoating, carpeting, or interior trim.
The good news is that most Mavericks rust in predictable locations. Once you know where to look, it’s much easier to evaluate a car’s condition.
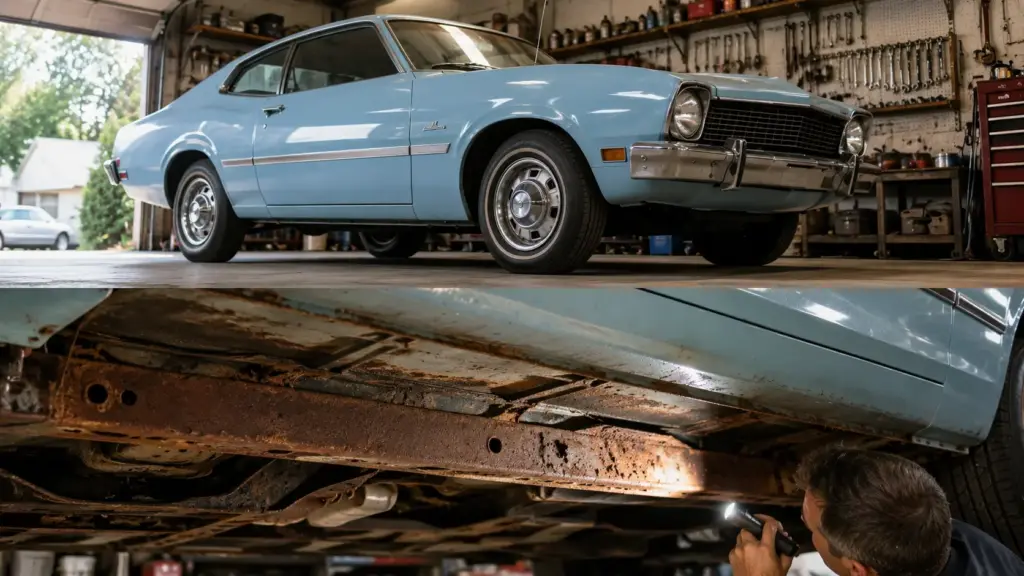
Common Causes of Rust
| Cause | Risk Level | Typical Damage |
|---|---|---|
| Road salt | ★★★★★ | Frame rails, floor pans, suspension |
| Water leaks | ★★★★★ | Floor pans, trunk floor |
| Dirt trapped behind fenders | ★★★★☆ | Lower fenders, rocker panels |
| Blocked drain holes | ★★★★☆ | Doors, quarter panels |
| Vinyl roof moisture | ★★★★☆ | Roof skin, window channels |
| Long-term outdoor storage | ★★★★★ | Entire body structure |
| Coastal environments | ★★★★☆ | General surface and structural rust |
Buying Tip: A faded, sunbaked Maverick from Arizona or California is often a better purchase than a shiny northern car with fresh paint hiding extensive rust.
Tools You’ll Need During an Inspection
You don’t need expensive equipment to inspect a classic Maverick, but bringing a few basic tools can help uncover problems that are easy to miss.
Recommended Inspection Kit
- Bright LED flashlight
- Small inspection mirror
- Thin work gloves
- Magnet
- Flat-head screwdriver (with the seller’s permission)
- Clean rag
- Knee pad or creeper
- Smartphone for photos
- Small jack (if allowed)
A flashlight alone can reveal hidden corrosion inside wheel wells, frame rails, and suspension components. A magnet is particularly useful for identifying body filler. If it doesn’t stick where it should, the panel may contain thick filler hiding rust damage.
Whenever possible, inspect the car in daylight and on a dry day. Water can temporarily hide bubbling paint and make surface rust appear less severe than it really is.

Ford Maverick Rust Area #1: Front Frame Rails
Why it rusts
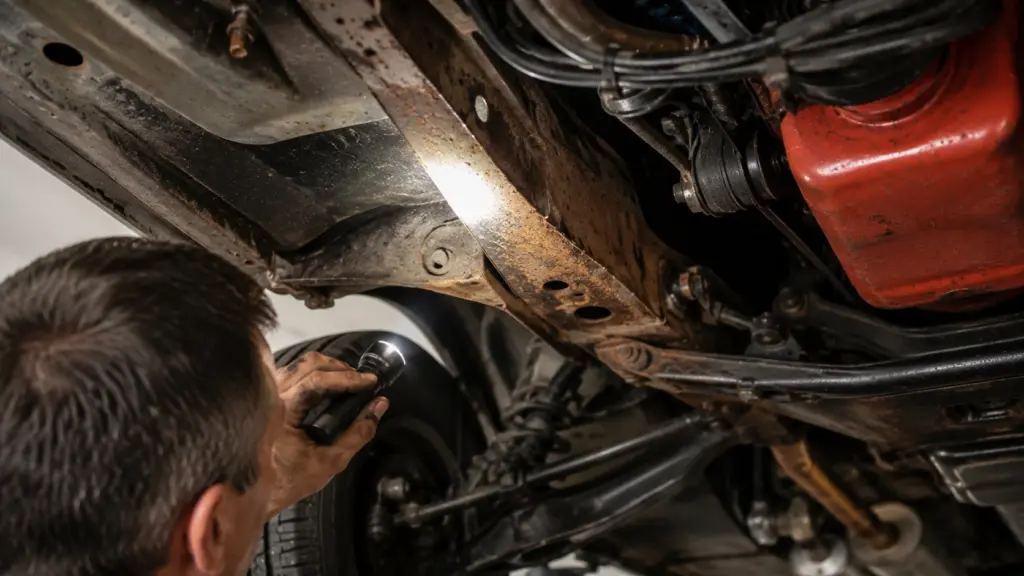
This is one of the most serious Ford Maverick rust problems because it directly affects the vehicle’s structural integrity.
The front frame rails are among the most important structural components on a Ford Maverick. They support the engine, front suspension, and steering system. Dirt, road grime, and moisture accumulate inside the boxed rails over decades, especially in cars driven in wet or snowy climates. Because much of the corrosion begins inside the rail, serious damage may not be obvious until the metal becomes dangerously thin.
How to Inspect
Use a flashlight to examine both sides of the frame rails from underneath the vehicle. Pay close attention to areas near the front crossmember and suspension mounting points.
Look for:
- Heavy scaling
- Flaking metal
- Swollen seams
- Fresh undercoating
- Previous weld repairs
- Rust holes
If possible, gently tap suspicious areas with a screwdriver handle. Solid steel should produce a sharp metallic sound, while weakened metal often sounds dull.
Warning Signs
- Large flakes of rust falling away
- Soft metal
- Cracks near suspension mounts
- Fresh black undercoating covering isolated sections
- Uneven welding
Ford Maverick Rust Area #2: Shock Towers
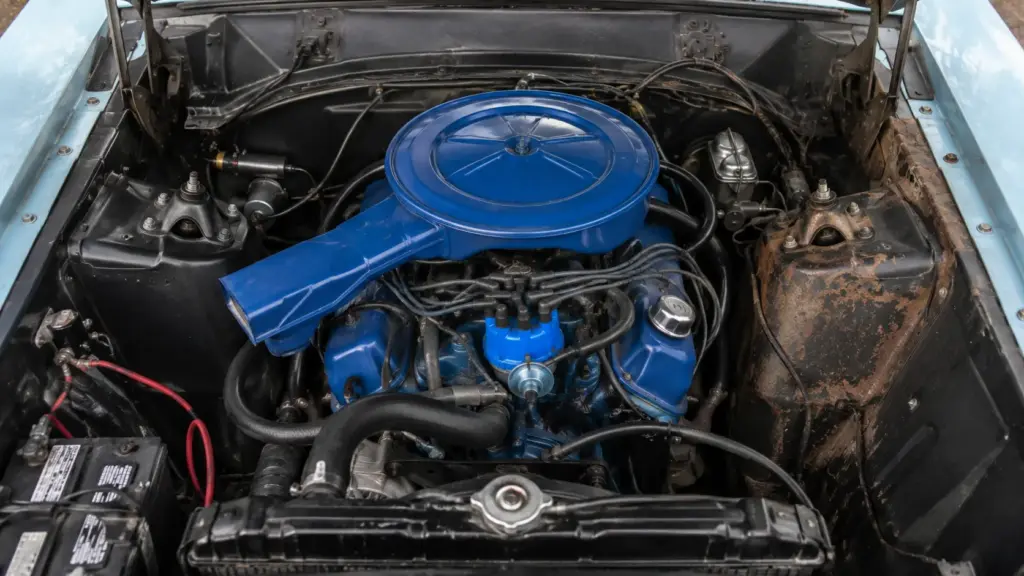
Ford Maverick rust around the shock towers should never be ignored, as it can compromise suspension safety.
The shock towers are another critical structural area that deserves careful attention.
Unlike cosmetic rust on a quarter panel, corrosion here can directly affect suspension geometry and vehicle safety.
Why They Rust
Water and road debris collect around the spring perches and upper control arm mounting points. Over time, moisture becomes trapped between overlapping metal sections, causing rust to spread from the inside out.
Cars that have spent years parked outdoors often show advanced corrosion in this area.
How to Inspect
Open the hood and inspect both shock towers carefully.
Look for:
- Bubbling paint
- Rust around spot welds
- Cracks near the upper control arm mounts
- Uneven repairs
- Fresh seam sealer
Don’t forget to inspect the underside from inside the wheel well.
Warning Signs
- Visible cracks
- Rust holes
- Distorted metal
- Poor weld repairs
Ford Maverick Rust Area #4: Front Floor Pans
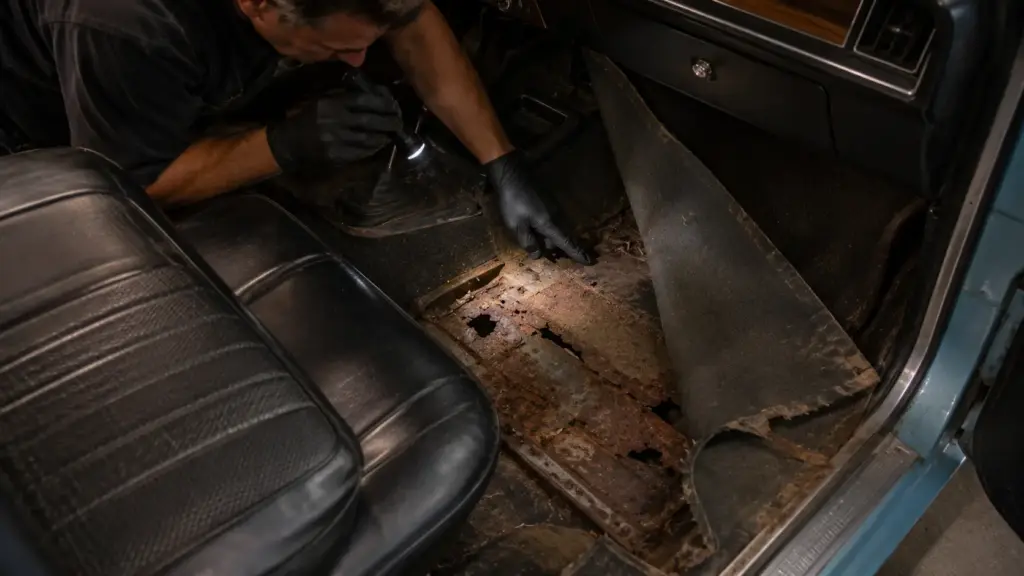
Floor pans are among the most commonly rusted areas on any classic Maverick. Fortunately, they’re also among the most repairable—provided the damage hasn’t spread into structural supports.
Why They Rust
Water enters through:
- Windshield leaks
- Cowl vent leaks
- Door seals
- Heater core failures
- Wet carpets left for months
Moisture trapped beneath carpet insulation can quietly destroy the floor from the inside.
How to Inspect
Lift the floor mats and carpet if possible.
Check for:
- Soft spots
- Discoloration
- Previous patch panels
- Moisture
- Pinholes
- Loose seam sealer
From underneath, inspect for fresh undercoating or welded patches.
Warning Signs
- Carpet feels damp
- Flexing floor
- Rust holes
- New sheet metal patches
- Excessive seam sealer
Ford Maverick Rust Area #6: Rocker Panels
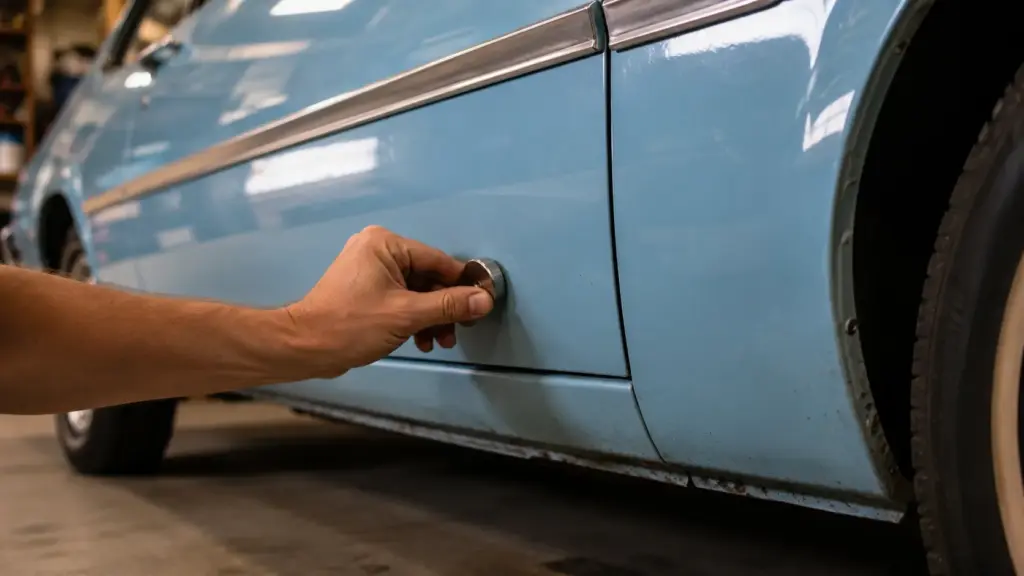
The rocker panels run beneath the doors and connect the front and rear of the body. While they may seem like simple body panels, they’re actually an important part of the Maverick’s structural strength.
Because they’re enclosed, rocker panels often rust from the inside out. By the time rust bubbles appear on the exterior, significant damage may already exist inside.
Why They Rust
Moisture enters through drain holes, door seals, or damaged undercoating. Dirt and road debris collect inside the rocker cavity, trapping water against the metal for years.
Cars driven on gravel roads or through snow and road salt are especially vulnerable.
How to Inspect
Start by kneeling beside the car and examining the entire length of both rocker panels.
Look for:
- Bubbling paint
- Blistering near the bottom edge
- Ripples in the sheet metal
- Fresh paint along the lower body
- Signs of body filler
Use a small magnet every few inches. If the magnet doesn’t stick consistently, the panel may contain a thick layer of body filler covering rust damage.
If possible, inspect the underside where the rocker meets the floor pan.
Warning Signs
- Paint bubbles
- Swollen seams
- Thick undercoating
- Poorly welded replacement panels
- Water trapped inside
Ford Maverick Rust Area #7: Lower Front Fenders
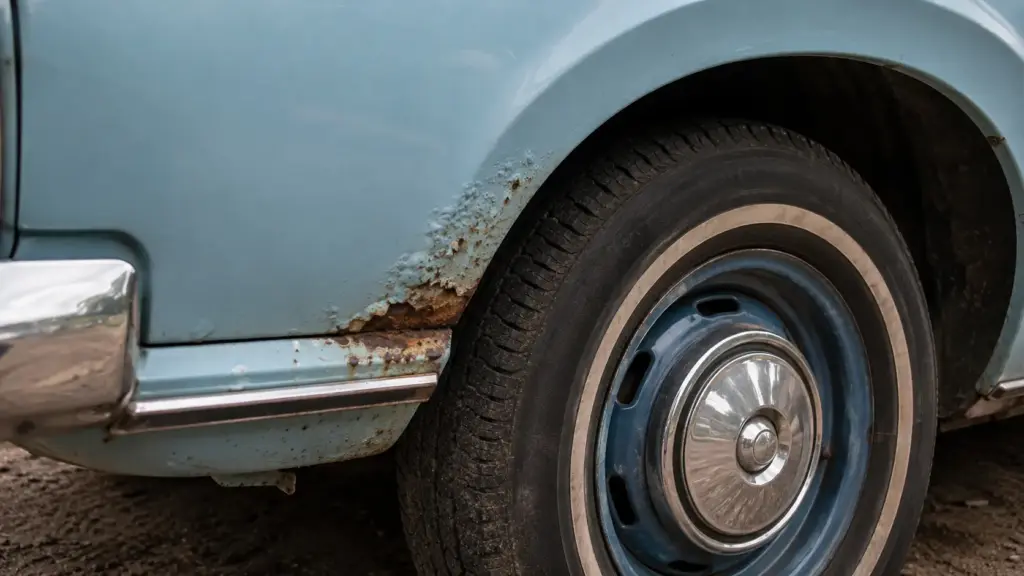
The lower rear section of the front fenders just behind the front wheels is one of the most common rust spots on a classic Ford Maverick.
This area acts like a pocket, collecting mud, leaves, and moisture every time the car is driven.
Why They Rust
Over decades, dirt becomes trapped behind the fender where it stays damp for long periods. This slowly corrodes the metal from the inside.
Many owners don’t discover the problem until bubbles appear in the paint.
How to Inspect
Turn the front wheels outward for better access.
Look carefully at:
- The rear edge of each front fender
- The inside lip of the wheel opening
- The lower mounting flange
Run your hand along the inside if accessible.
Look for:
- Bubbling paint
- Rust stains
- Cracked seam sealer
- Loose undercoating
Warning Signs
- Paint bubbles
- Visible rust inside wheel well
- Fresh paint limited to the lower fender
- Body filler
Ford Maverick Rust Area #10: Trunk Floor
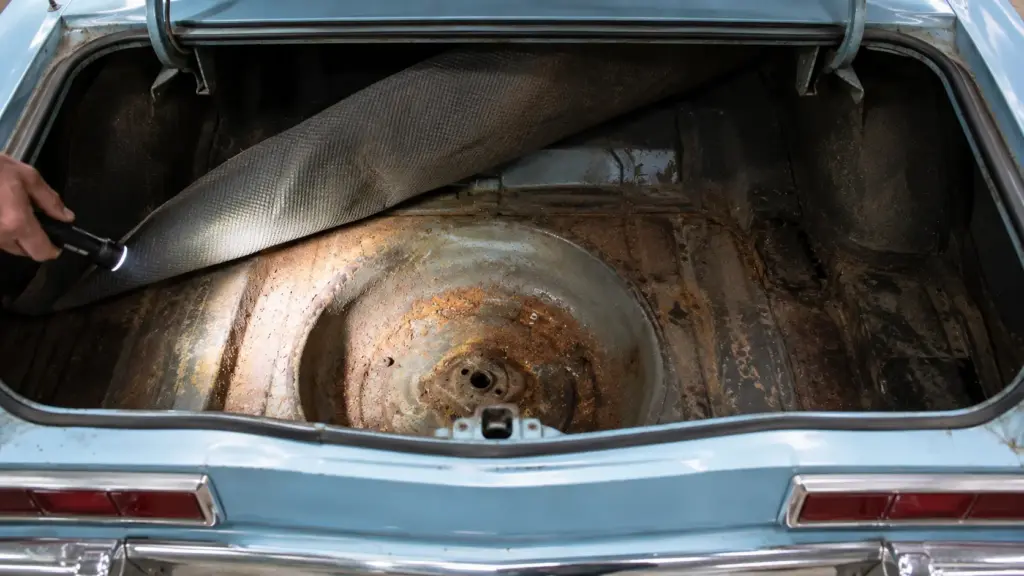
The trunk is one of the easiest places to inspect and one of the most overlooked.
A spotless trunk carpet can hide serious corrosion underneath.
Why It Rusts
Water commonly enters through:
- Worn trunk weatherstrip
- Rear window seal
- Tail light gaskets
- Antenna mounting holes
- Quarter panel seams
Once trapped beneath the trunk mat, moisture slowly corrodes the steel.
The spare tire well is especially vulnerable because it’s the lowest point in the trunk.
How to Inspect
Remove everything from the trunk.
Lift the trunk mat and inspect:
- Entire trunk floor
- Spare tire well
- Rear body panel
- Trunk braces
- Wheel housings
From underneath the vehicle, inspect the same area for previous patches or fresh undercoating.
Warning Signs
- Water stains
- Rust flakes
- Soft metal
- Pinholes
- Weld repairs
- Standing water
Pay particular attention to the spare tire well.
If it’s filled with rust or patched poorly, chances are the trunk has experienced long-term water intrusion.
Ford Maverick Rust Area #13: Cowl Vent Area
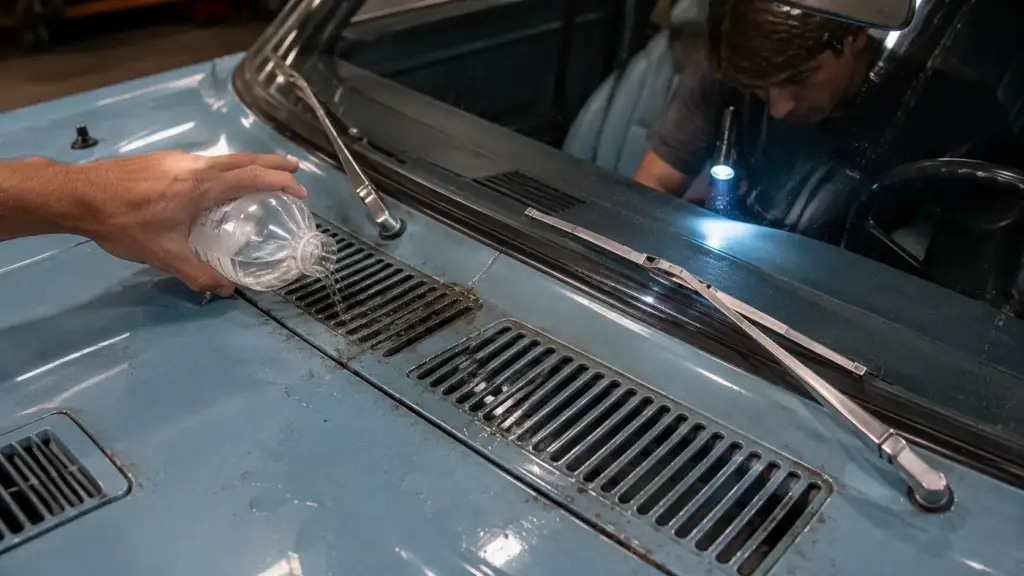
If experienced Ford Maverick restorers had to choose one hidden rust area that causes the most headaches, many would point to the cowl vent.
Because it’s hidden beneath the cowl panel, buyers often don’t discover the problem until water begins leaking into the interior.
Why It Rusts
Rainwater enters through the cowl vents at the base of the windshield.
Originally, this water drained through built-in channels.
After decades, leaves, pine needles, and dirt clog the drains. Water then sits inside the cowl, gradually rusting it from the inside out.
Eventually, the rust creates holes that allow water to enter the passenger compartment.
How to Inspect
Look for these warning signs:
- Damp front carpet
- Musty smell inside the cabin
- Rust stains beneath the dashboard
- Water marks on kick panels
If the seller agrees, perform a simple water test.
Slowly pour a small amount of water into the cowl vent while someone watches inside the cabin.
Any water entering the interior usually indicates rust inside the cowl.
Warning Signs
- Wet carpet after rain
- Fogging windows
- Rust around kick panels
- Water dripping beneath dashboard
Ford Maverick Rust Area #15: Battery Tray and Inner Apron
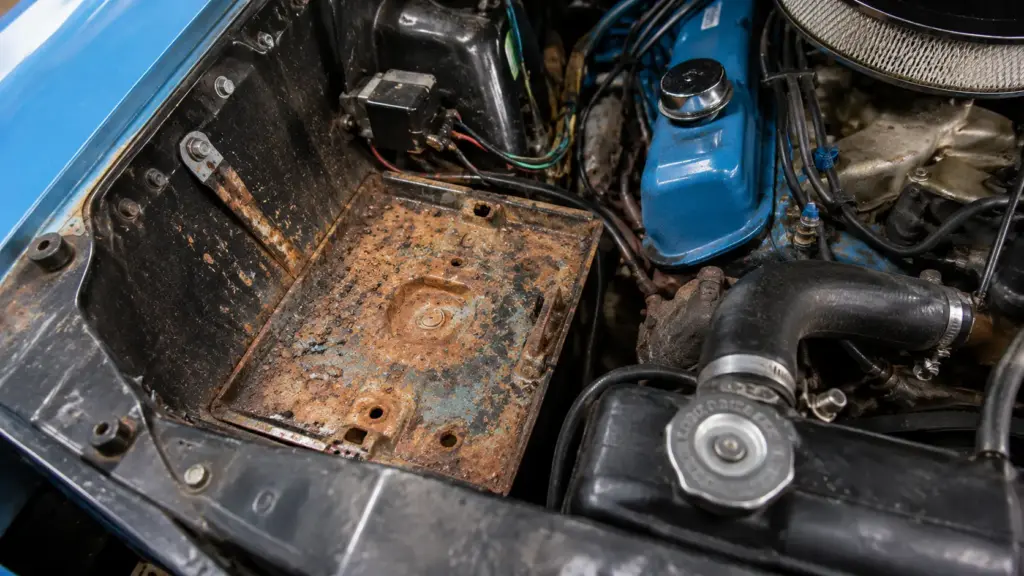
Battery acid is incredibly corrosive.
Over decades, leaking batteries frequently damage the tray, inner fender apron, and surrounding sheet metal.
Fortunately, this is usually localized damage.
Why They Rust
Battery acid eats away paint and protective coatings.
Once bare steel is exposed, corrosion spreads rapidly.
How to Inspect
Open the hood and inspect:
- Battery tray
- Inner fender apron
- Radiator support
- Battery hold-down bracket
Look for:
- Rust holes
- Flaking paint
- Acid stains
- Previous repairs
Warning Signs
- Thin metal
- Missing battery tray sections
- Poor weld repairs
- Rust spreading into adjacent panels
Ford Maverick Rust Severity Guide
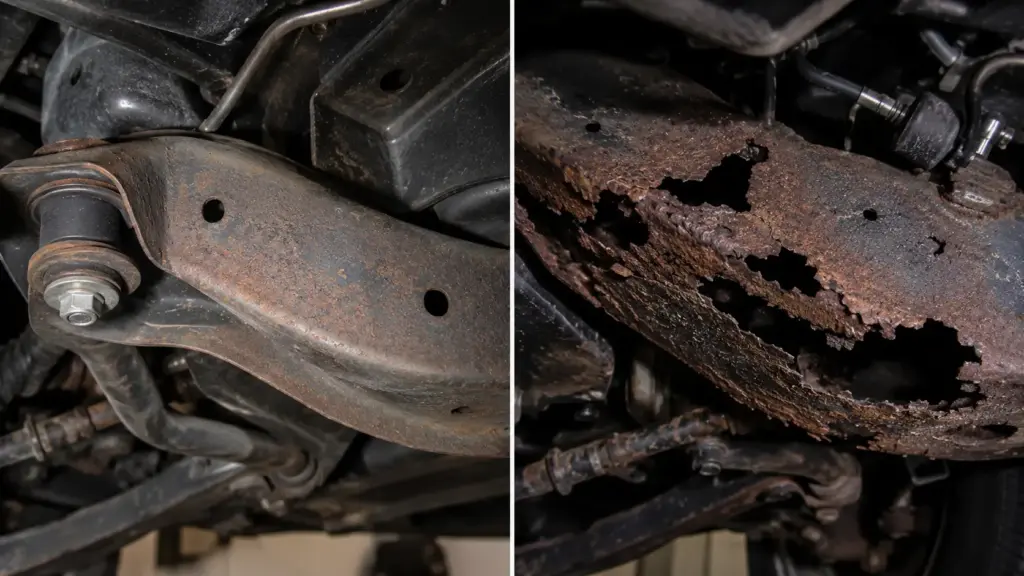
Not all rust should scare you away from a purchase. Understanding the difference between cosmetic and structural corrosion is one of the most valuable skills a classic car buyer can develop.
For readers interested in repairing minor corrosion themselves, Eastwood publishes guides on rust treatment, welding, and restoration techniques.
| Rust Type | What It Looks Like | Safe to Buy? | Typical Repair Cost |
|---|---|---|---|
| Surface Rust | Light orange discoloration with solid metal underneath | ✅ Yes | $50–$300 |
| Scale Rust | Flaking rust but metal still intact | ✅ Usually | $300–$1,000 |
| Rust Pitting | Small pits in the metal without holes | ✅ Usually | $500–$1,500 |
| Pinholes | Small perforations through the panel | ⚠ Depends | $800–$2,000 |
| Structural Rust | Rust affecting frame rails, torque boxes, or suspension mounts | ❌ Usually No | $2,000–$7,000+ |
| Extensive Hidden Rust | Large areas concealed by filler or undercoating | ❌ Walk Away | Often exceeds the car’s value |
Rule of thumb: Cosmetic rust is often repairable. Structural rust deserves far more scrutiny because it affects both safety and restoration costs.
Final Thoughts
Rust is the single biggest factor that can turn an exciting Ford Maverick purchase into an expensive restoration project. While faded paint, worn interiors, or minor mechanical issues are often straightforward to address, structural corrosion demands much more careful evaluation.
The good news is that Ford Mavericks tend to rust in predictable places. By inspecting the 15 areas covered in this guide, you’ll be far better equipped to separate a solid survivor from a car hiding costly repairs.
Remember, patience is one of the best tools a classic car buyer can have. If a Maverick doesn’t pass your inspection or if the seller won’t let you look closely don’t be afraid to walk away. Another opportunity will come along, and choosing the right car from the start will save time, money, and frustration.
Whether you’re searching for a weekend cruiser, a restoration project, or your dream show car, a careful rust inspection is one of the smartest investments you can make.
Happy hunting, and may your next Ford Maverick be solid where it matters most.